
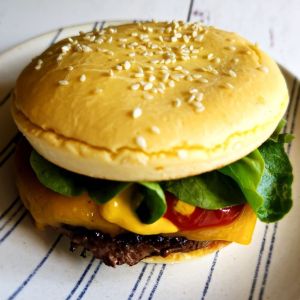
The Best Ever Gluten Free Soft Hamburger Buns Recipe
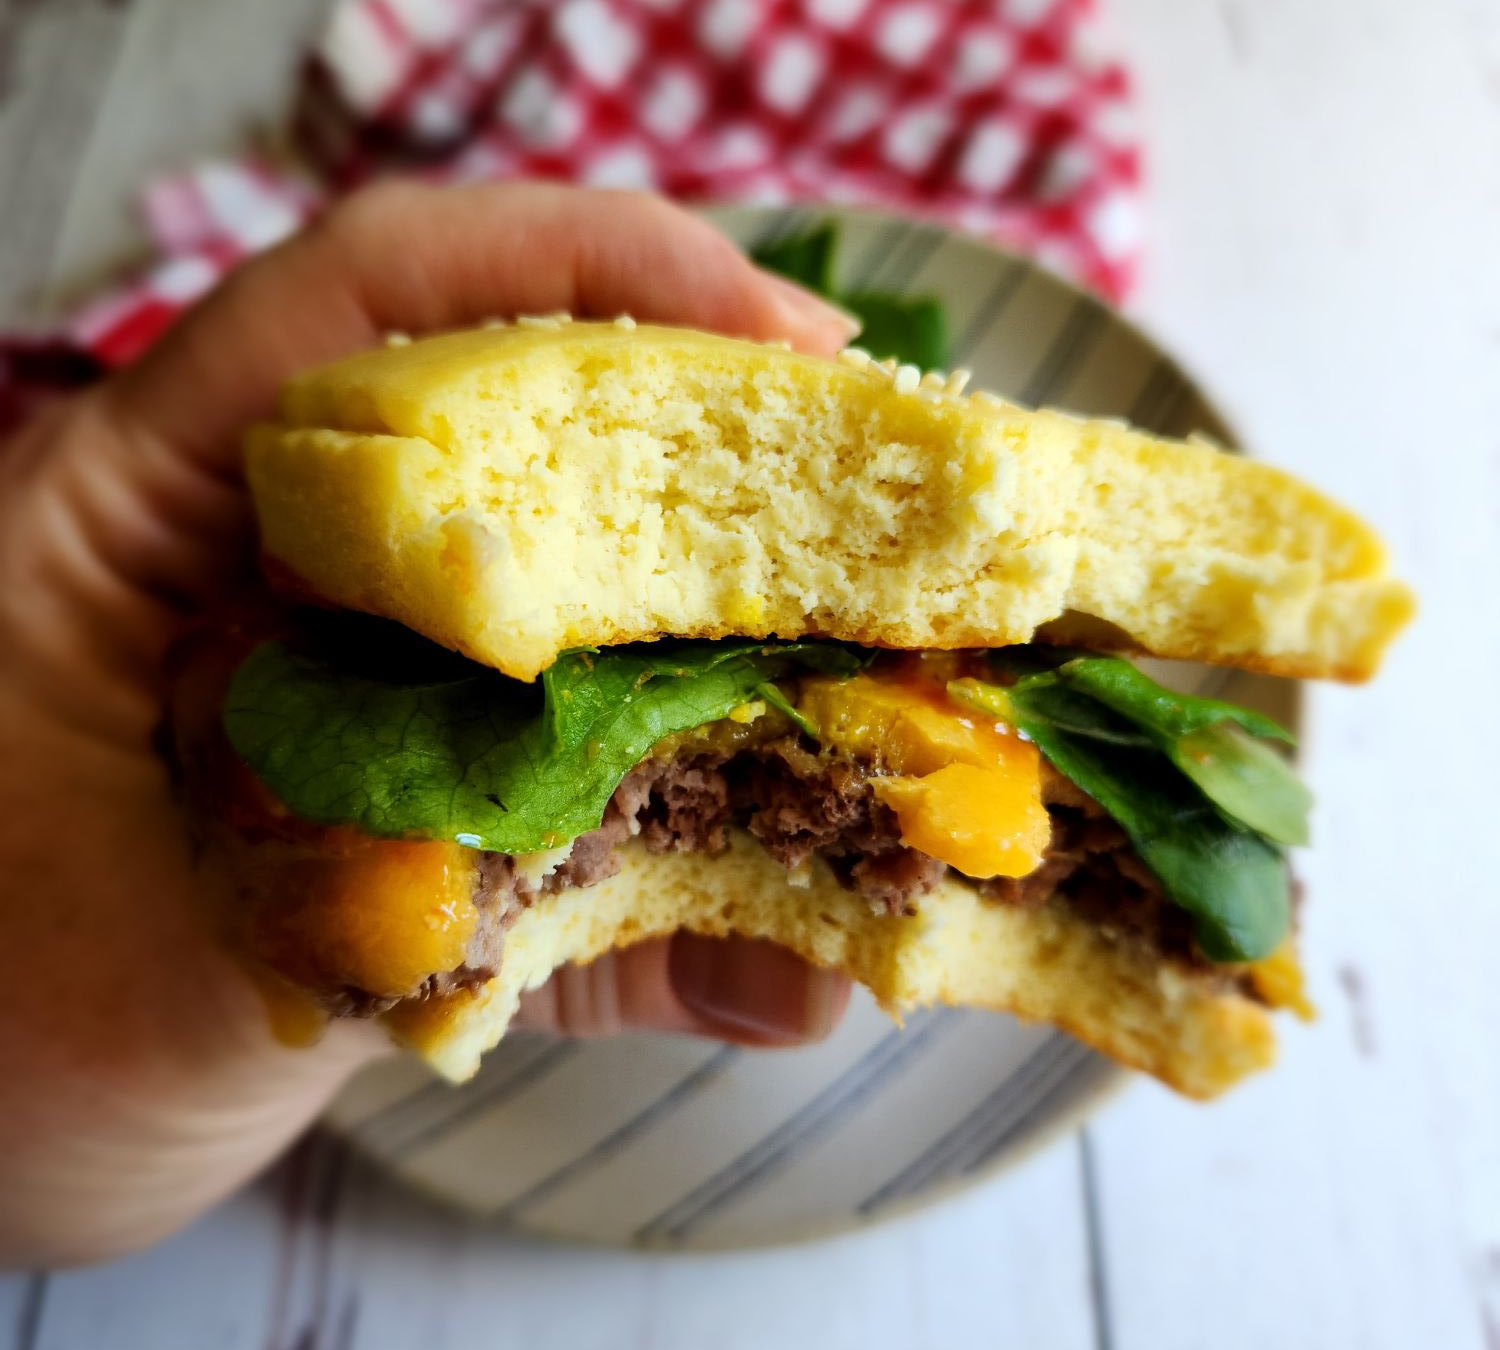
If you are looking for the best ever gluten free soft hamburger buns that do not fall apart and are soft like you remember buns like, then this recipe is definitely for you!
I know how hard it is to find a good burger bun to enjoy during grilling season so I created one that can be whipped up easy in your blender.
There will be no yeast mixture to worry about, no waiting for the dough rise, and no xanthan gum, guar gum or psyllium husk powder in this gluten-free buns recipe.
This low carb hamburger bun recipe also does not contain any tapioca flour, tapioca starch, potato starch, or sugars and the best part is that you can make them up and freeze for later.
Skip the hard, crumbly ones from the grocery store, or the floppy lettuce wrap and go with this easy gluten free recipe for fluffy buns!
• This gluten-free hamburger bun recipe requires no yeast, no rising time, and contains no xanthan gum, guar gum, psyllium husk powder, tapioca flour, potato starch, or added sugars.
• The recipe is made entirely in a blender and uses only six basic ingredients: eggs, cream cheese, almond flour, baking powder, sweetener, and sea salt.
• The buns can be made in either a 4-inch silicone bun pan to produce 3 large buns or in 3-inch wide-mouth canning rings to make 5 smaller slider-sized buns.
• The batter requires a 5-minute resting period after initial blending to allow the almond flour to absorb the liquid ingredients and properly thicken before baking.
• These hamburger buns can be stored in the refrigerator for up to 5 days or frozen for up to 3 months when individually wrapped in plastic wrap.
Keep reading as I walk you through this easy recipe and give tips, substitutions and answer frequently asked questions.
Why You Should Make Your Own Gluten-Free Hamburger Buns
Making your own homemade gluten-free hamburger buns ensures that they’re free from gluten and other allergens, plus, fresh tastes so much better anyway!
When looking for low carb AND gluten free you may run into ones that are keto but use vital wheat gluten which is a big no!
This recipe for gluten-free burger buns gives you the ability to vary your recipe to your liking and ensure it is low carb and free of gluten.
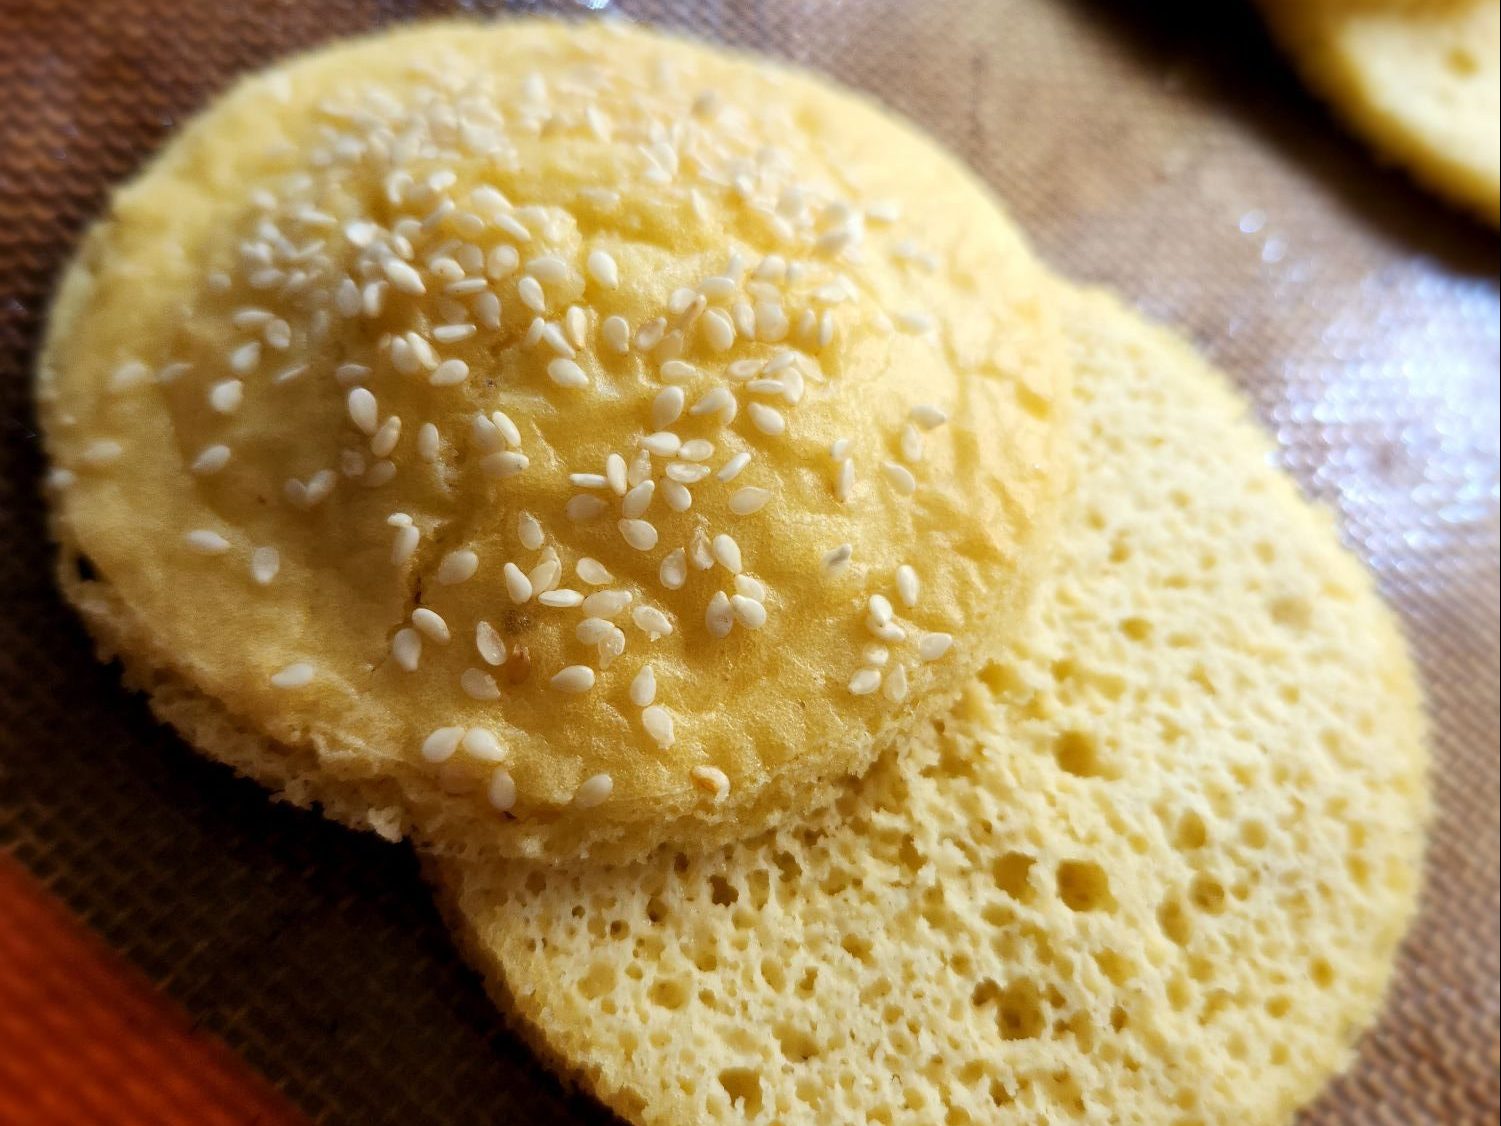
Make them onion buns with dried minced onion on top, or sesame sprinkles, or just plain for the purists. Check out the tips, substitutions and FAQ section for more ideas with this versatile recipe.
What you will need to make The Best Gluten-Free Hamburger Buns
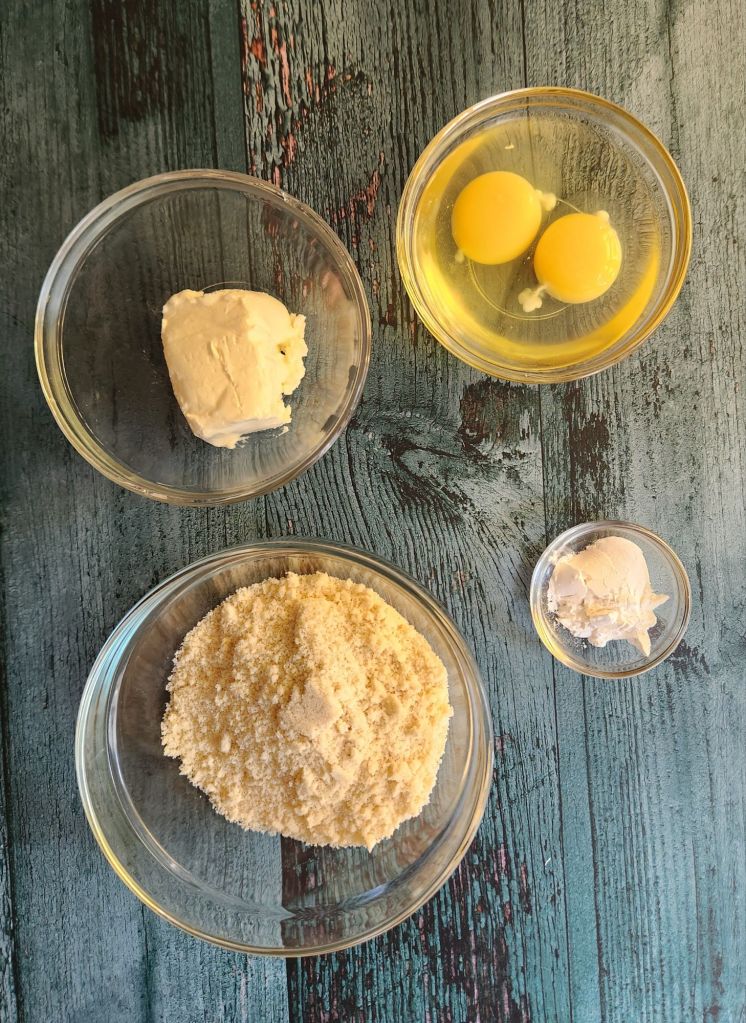
- Large Eggs
- Cream Cheese (regular or dairy free)
- Almond flour
- Baking powder
- Stevia drops or cane sugar
- Pinch of sea salt
- Optional toppings: Sesame seeds, Poppy seeds, Onion Flakes
| Original Ingredient | Substitute Option | Adjustment Needed |
| Cream Cheese | Dairy-free cream cheese | Omit added salt |
| Whole Eggs | Egg whites only | Use 2 whites per whole egg |
| Almond Flour | GF flour blend | May need extra egg if too thick |
| Stevia Drops | Cane sugar | Use 1-2 teaspoons |
Let’s make these gluten free hamburger buns
Preheat your oven to 350 degrees F and prepare your baking pan.
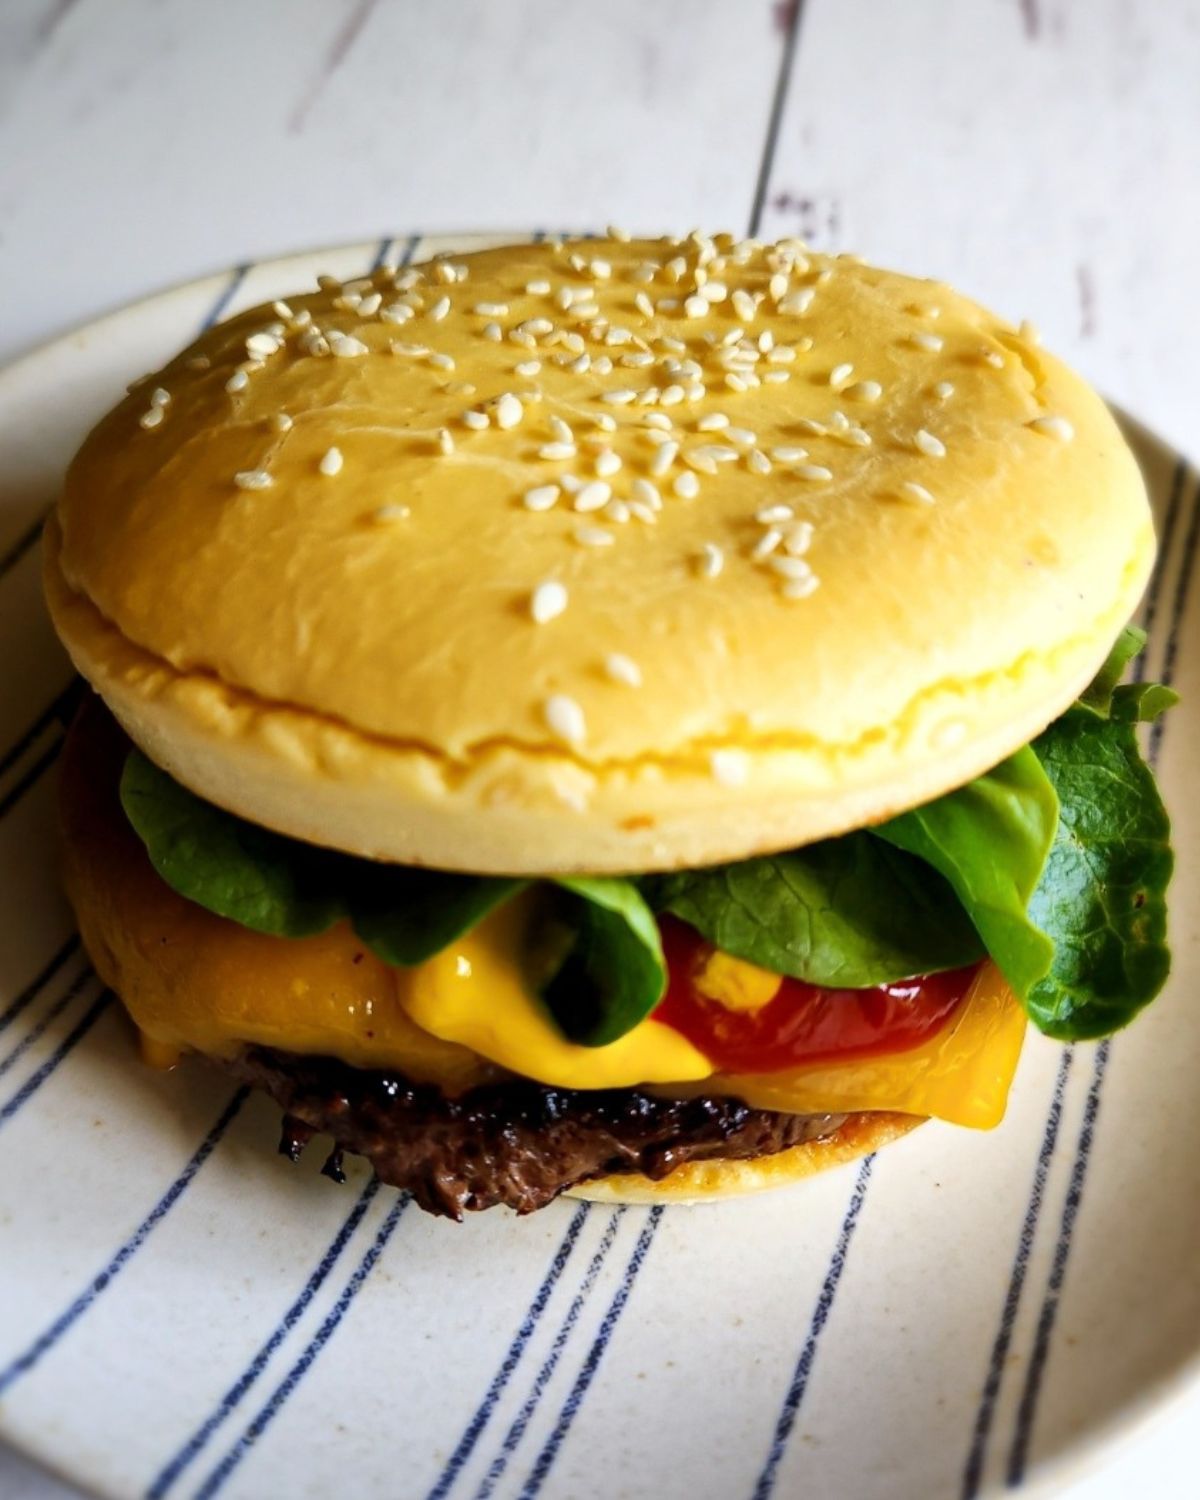
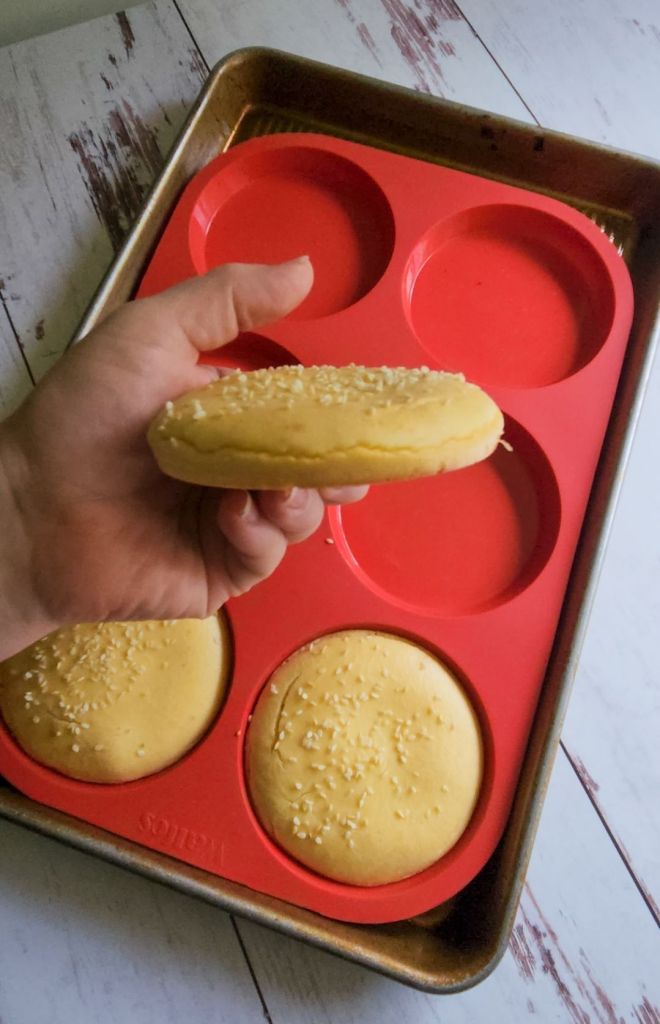
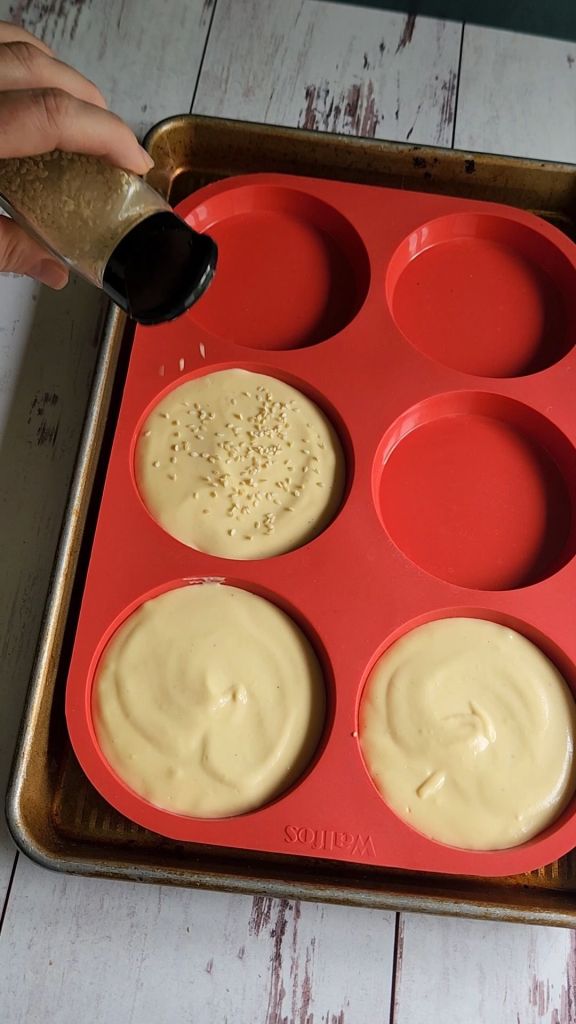
I chose to use a silicone bun pan that has a 4″ diameter, comparable to a regular size burger.
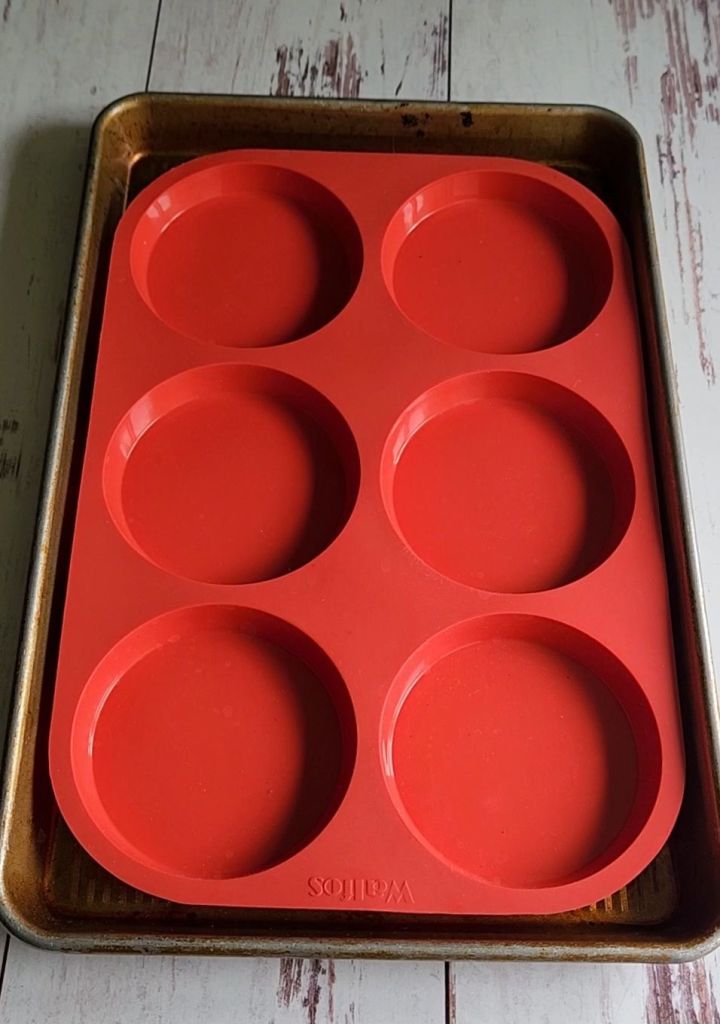
If this is your first time making these buns and you do not have the special bun pan, you can use greased wide mouth canning rings placed on a baking sheet lined with parchment paper.
| Pan Type | Bun Yield | Bake Time |
| 4″ Silicone Bun Pan | 3 large buns | 12-15 minutes at 350°F |
| 3″ Canning Rings | 5 slider buns | 12-15 minutes at 350°F |
| Muffin Tin (dinner rolls) | 6-8 rolls | 10 minutes at 350°F |
| Hot Dog Bun Mold | 3-4 hot dog buns | 12-15 minutes at 350°F |
This will give you 3″ diameter buns that are best for smaller hamburgers or slider sandwiches. I have tried this recipe multiple times with both and it turns out every time.
The best way to get the picture-perfect size of burger bun like in my pictures is to purchase a bun pan.
Grease the bun pan a little bit and place on a baking sheet or place greased canning rings on the parchment lined baking pan.
Add the eggs to your blender or food processor first.
Follow with the cream cheese, then lastly put in the almond flour, baking powder, sweetener and sea salt.
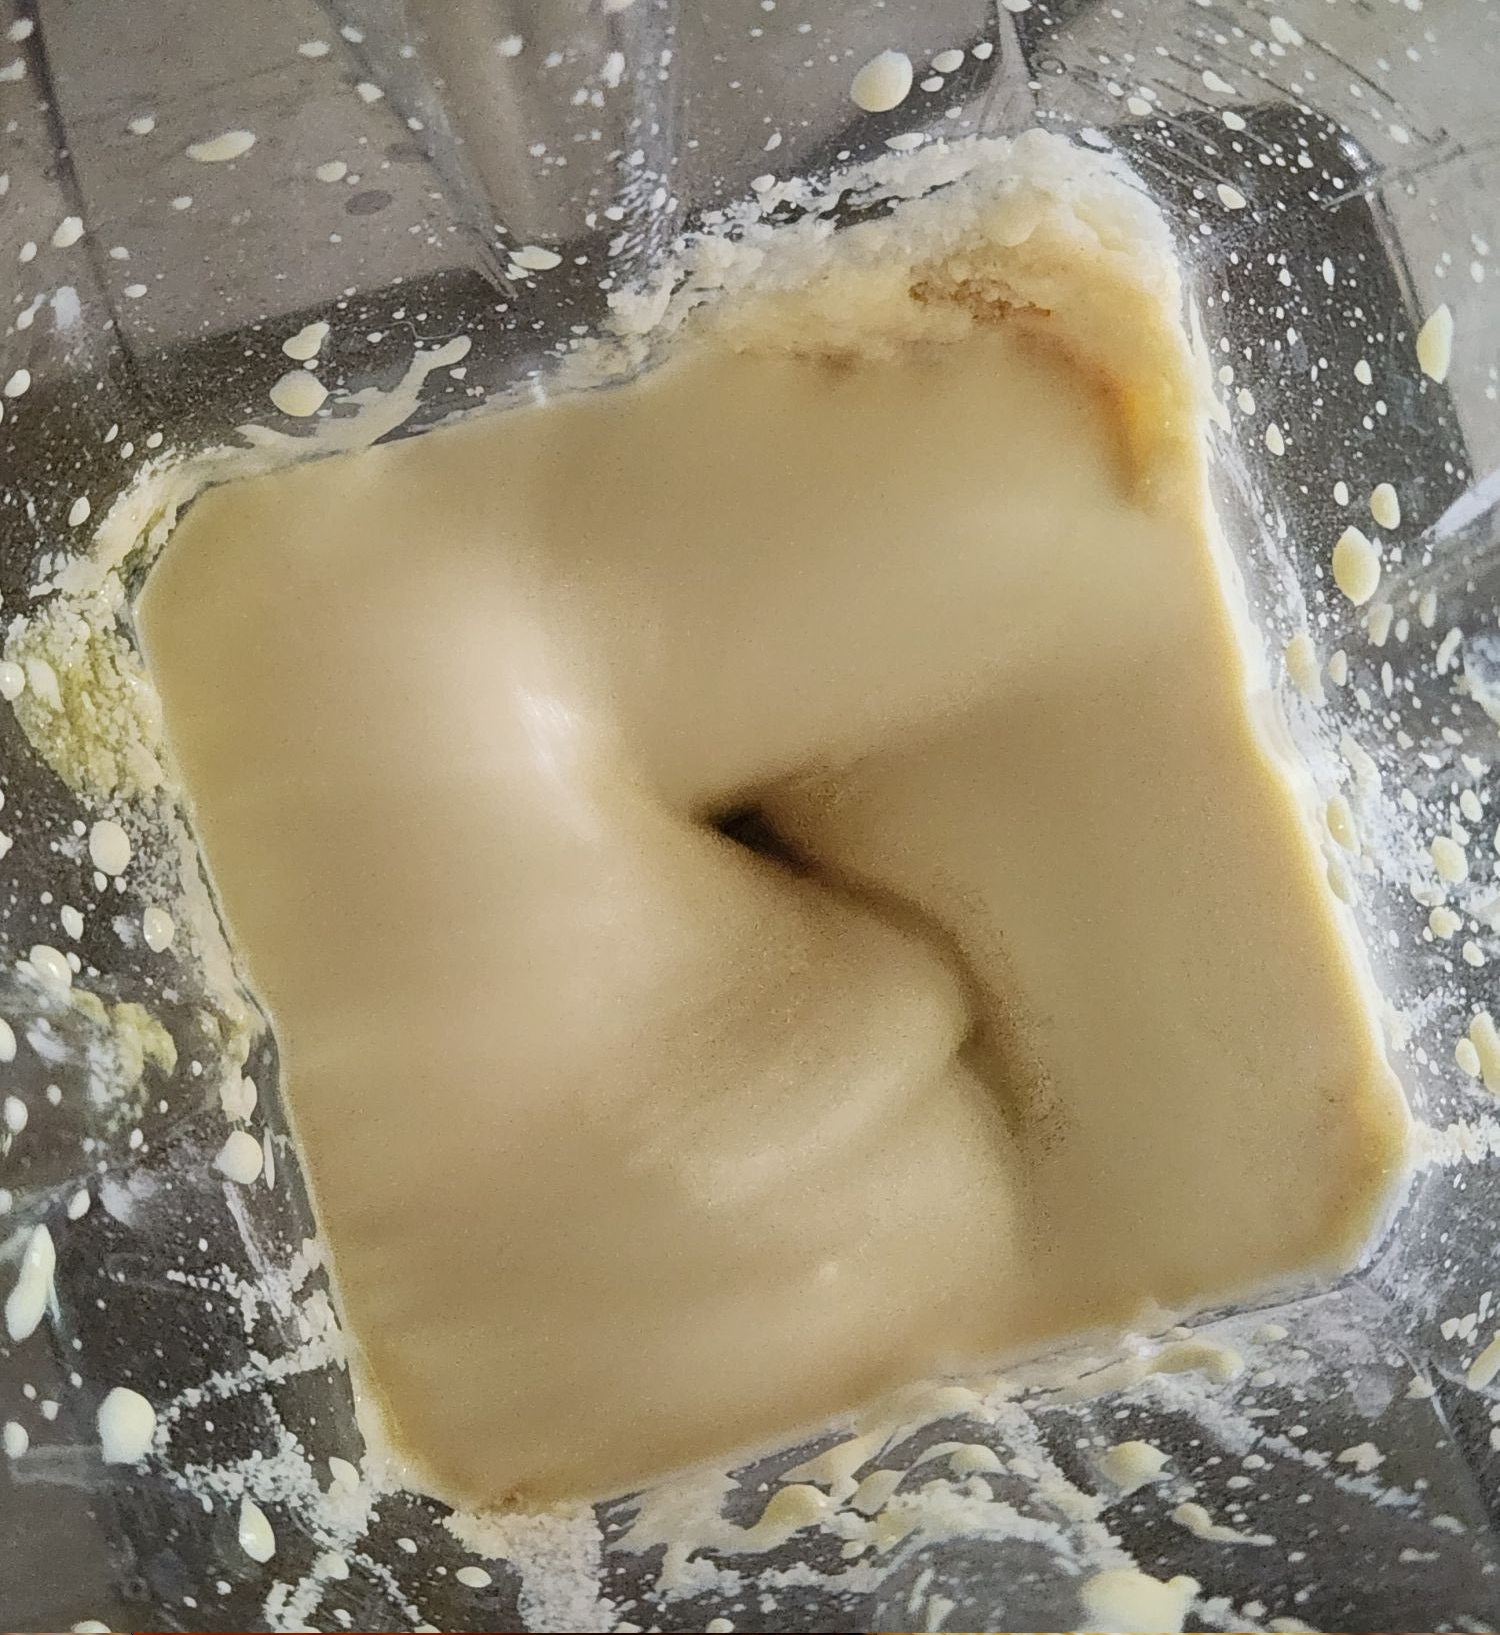
Blend or process for 30 seconds.
Stop the blender or processor and scrape down the sides of the container to evenly blend the dough ingredients. Blend again for 30 seconds then let the batter sit in the blender for 5 minutes.
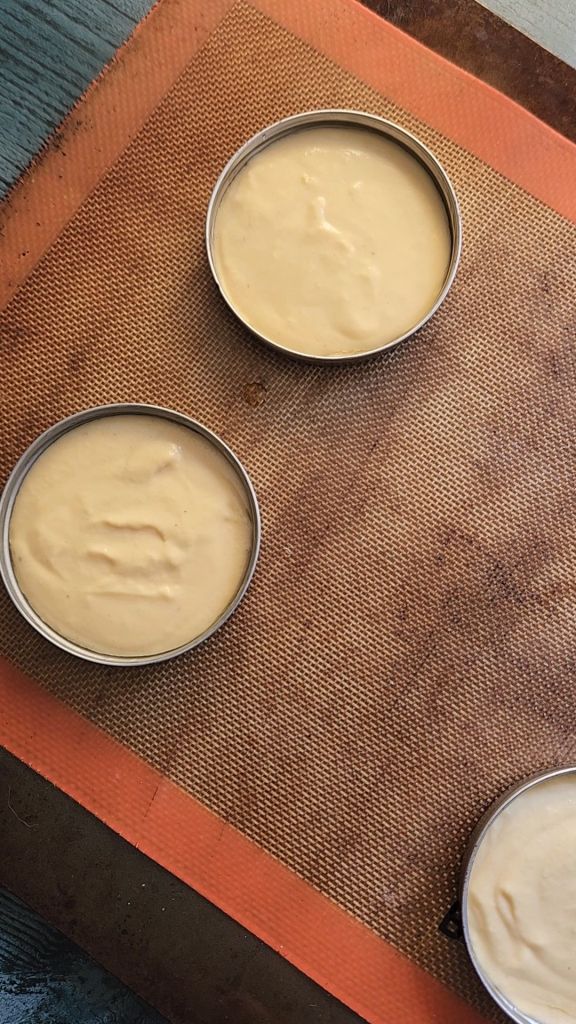
This gives the almond flour time to soak up the liquid ingredients and become thickened. Once the wait time is up, blend again. Now pour and scrape the sticky dough evenly into the wells or rings.
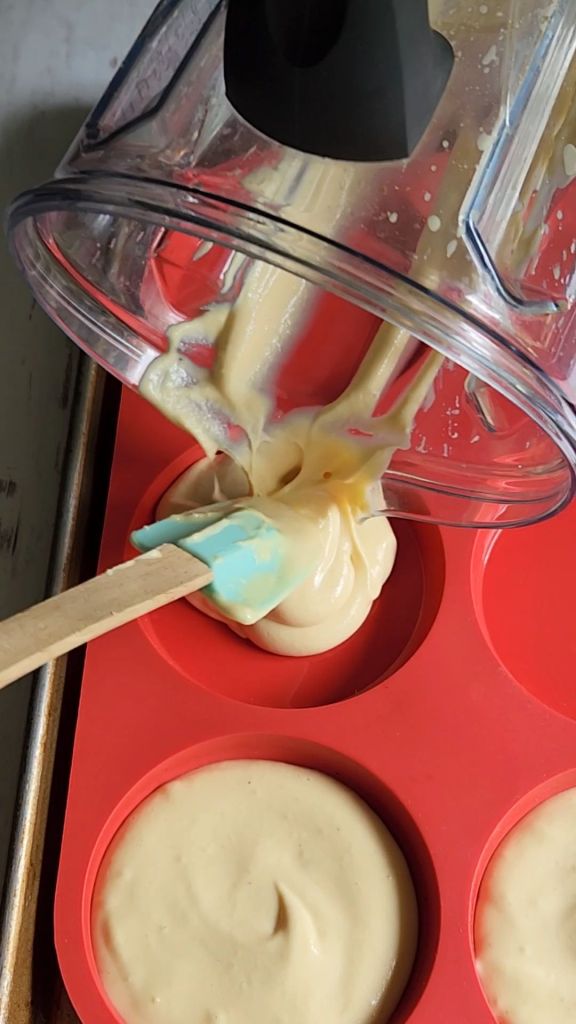
Fill them up 2/3 of the way to allow space for rising without spilling over.
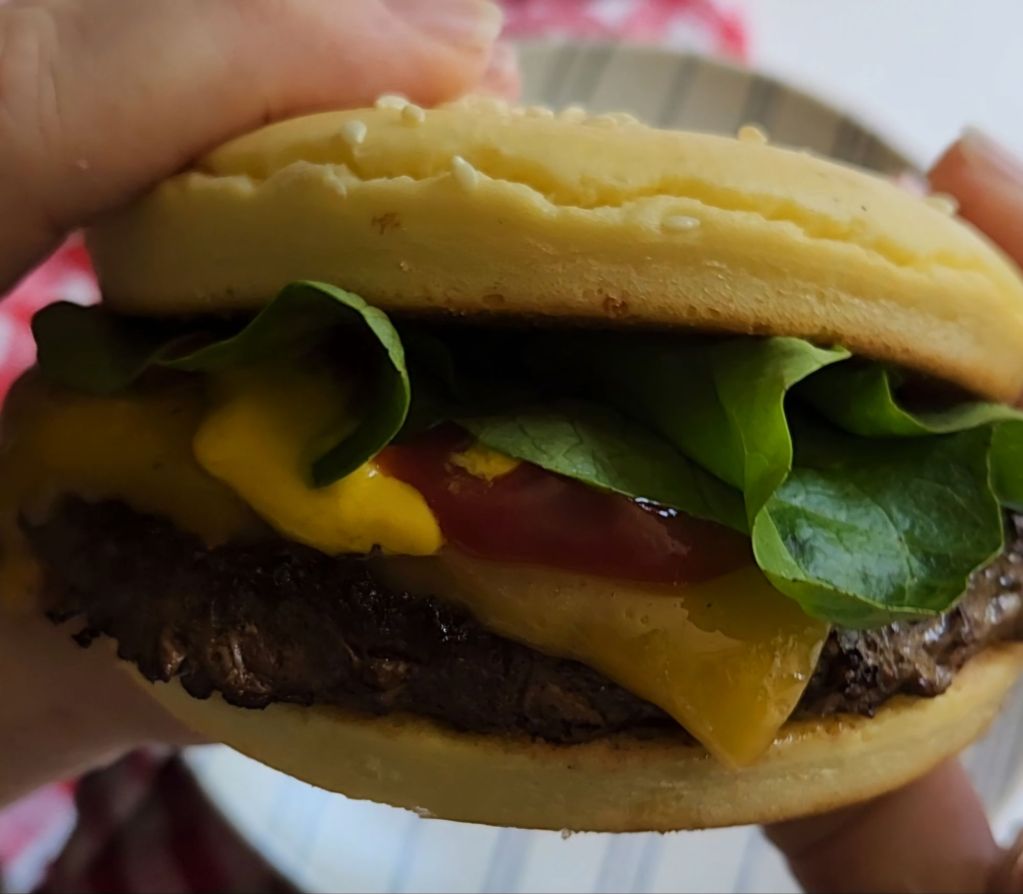
They are ready when they appear glossy and firm in the middle.

They will not turn as golden brown as yeast bread buns, so do not overcook them because they are still light colored.
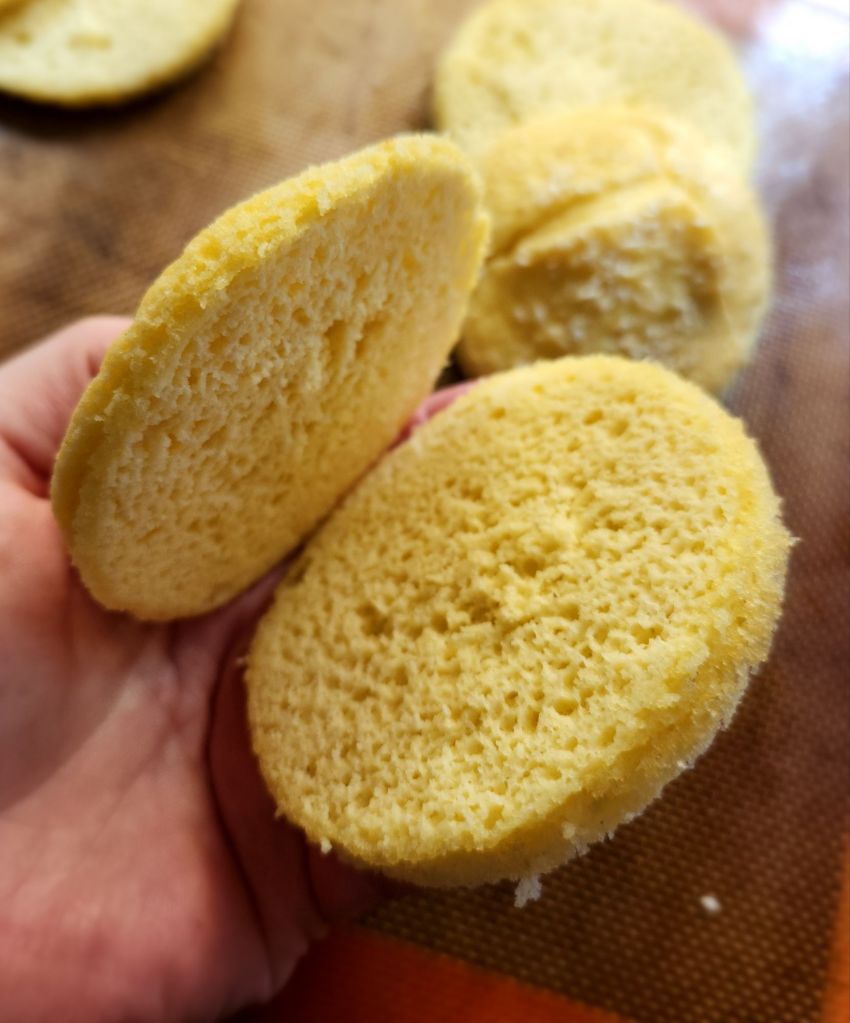
Let them cool on the pan for 5 minutes so you can easily press them out of the mold without tearing.
Finish cooling them on a wire rack before using for your burger.
This recipe makes 3 large 4-inch buns, or 5 small 3-inch buns.
One batch of 3 large buns gives you two tops and two bottoms.
The third bun will be split in half to create two bottoms.
Keep this in mind if you are going to add your favorite toppings to the top of the buns.
The smaller canning ring sized ones make great sliders for ham and cheese or hamburgers when you split one in half or use one for the top and one for the bottom.
Store any leftovers in an airtight container in the fridge or freeze up to 3 months.
Serving size: 1 1/2 gluten free buns; Servings: 2; Amount per serving: Calories 229; Total Fat 19.3g; Sodium 159mg; Carbohydrate 4.3g; Dietary Fiber 1.1g; Protein 10.4g; Vitamin D 18mcg; Calcium 157mg; Iron 1mg; Potassium 353mg
The Science Behind the 5-Minute Rest: Why This Step Makes or Breaks Your Buns
Most gluten-free baking recipes skip explaining why timing matters, but this 5-minute rest period is the secret to achieving the perfect texture.
What Happens During the Rest Period:
• Almond flour particles absorb moisture and expand, creating structural stability
• Egg proteins begin to bind with the cream cheese, forming an elastic network
• Air bubbles redistribute evenly throughout the batter for uniform rise
• The mixture thickens from pancake-batter consistency to a proper dough texture
The Temperature Factor:
Room temperature ingredients matter here. Cold cream cheese won’t emulsify properly with the eggs, creating dense spots in your finished buns. Let your cream cheese sit out for 30 minutes before starting, and your eggs should be at room temperature too.
Visual Test for Perfect Consistency:
After the 5-minute rest, your batter should coat a spoon and slowly drop off in ribbons—not pour like liquid or stick like paste. If it’s too thin, add 1 tablespoon of almond flour. Too thick? Add 1 teaspoon of water.
How to Customize Your Gluten-Free Hamburger Buns
One of the great things about making your own buns is the ability to customize them.
Here are some ideas of variations for next time:
- Garlic and Herb: Add 1 teaspoon garlic powder and 1 teaspoon dried herbs (such as rosemary, thyme, or oregano) to the dry ingredients.
- Cheese: Mix 1/2 cup shredded cheese (cheddar, mozzarella, or Parmesan) into the batter before rising.
- Sweet Buns: Increase the sweetener and add 1 teaspoon vanilla extract or pineapple extract to the wet ingredients. Adding pineapple extract gives you a Hawaiian roll version.
- Sesame Seeds: Classic and always a favorite is sprinkling on some sesame seeds to the top of the bun batter. Try white sesame or a mix of black and white sesame seeds.
- Poppy Seeds: Adds a nice nutty crunch and visual appeal.
- Everything Bagel Seasoning: For a flavorful twist that goes well with hamburgers or meat sandwiches.
- Sea Salt Flakes: Simple yet delicious with a salty zip with each bite.
| Bun Variety | Add to Batter | Best Used For |
| Hawaiian Style | 1 tsp pineapple extract + 1 tbsp maple syrup | Pulled pork, ham sliders |
| Garlic Herb | 1 tsp garlic powder + 1 tsp dried herbs | Beef burgers, chicken sandwiches |
| Cheese Buns | 1/2 cup shredded cheese | Any burger or sandwich |
| Sweet Buns | Extra sweetener + 1 tsp vanilla extract | Breakfast sandwiches |
Tips, Substitutions, and FAQs
- Ensure all your ingredients are at room temperature before you start mixing. This helps the dough come together more smoothly, especially if you are not using a blender.
- To prevent the buns from sticking, lightly grease the bun molds or canning rings with cooking spray or olive oil, even if it is silicone.
- Brushing the tops of the buns with a whole egg wash or melted butter in the last few minutes of baking gives them a beautiful golden brown color. If you are going to do this, save your toppings until after this so they do not get brushed off.
- Let the buns cool completely on a wire rack before slicing. This helps them set and hold their shape.
- Store any leftover buns in an airtight container to keep them fresh. For longer storage, freeze the buns in a freezer bag.
- Reduce the amount of fat in the recipe when you replace the whole eggs with egg whites. One whole egg is the same as 2 egg whites.
- Turn these into dinner rolls easily when you bake the dough in a muffin tin. Bake for 10 minutes then check to make sure they are not overcooked. Make them sweetened when you add in 1 tablespoon of maple syrup to the batter before baking.
| Storage Method | Duration | Best Practice |
| Room Temperature | Up to 2 days | Airtight container only |
| Refrigerated | Up to 5 days | Airtight container |
| Frozen | Up to 3 months | Wrap individually in plastic wrap |

Can I make these buns without a blender and use a stand mixer? Yes, you can mix the dough in a large mixing bowl with a stand mixer or hand mixer. You will need to mix softened cream cheese with the eggs first, then mix in the combined dry ingredients. Mix until you get a soft and smooth batter. You get a better texture with a blender or food processor though.
Can I use a different type of gluten-free flour blend or other gluten free flour like oat flour, millet flour or brown rice flour? Yes, you can use your favorite Bob’s Red Mill gluten-free flour blend instead of the almond flour. You just need to be aware that when your batter is prepared, it resembles a very thick pancake batter. You may need to add an additional egg if it is too thick. Do not add in dairy-free milk as this will result in a batter that doesn’t set up properly.
Can I make these buns dairy-free? Absolutely! Substitute the cream cheese with a dairy-free alternative cream cheese. It works just like with regular cream cheese and you can hardly tell the difference. You may want to leave out the pinch of salt addition as dairy free versions are usually saltier than regular cream cheese.
How should I store leftover buns? Store leftover buns in an airtight container at room temperature for up to 2 days or for longer storage put in the fridge up to 5 days. Freeze the buns in a freezer bag for up to 3 months. I recommend wrapping each split bun with plastic wrap to prevent freezer burn.
Can I make hot dog buns with this recipe? Yes, you can make hot dog buns easily with this bun recipe. You must purchase a hot dog bun mold just as the round bun mold I used. Make sure it does not have mesh holes but is a solid material. Hot dogs fit perfectly in these special molds that are online.
Why do I not need instant yeast or active dry yeast? Instant yeast is needed for gluten free recipes that follow a regular dough recipe. This recipe is designed like other quick gluten-free bread recipes that use baking powder for rising. If you want the taste that instant yeast gives regular buns, just put a pinch into the recipe before blending.
Can I add seeds or grains to the dough? Yes, you can add seeds like chia, flax, or sunflower seeds to the dough for added texture and nutrition. Once the dough is blended, pour the batter into a large bowl and fold in the seeds you want to use. This ensures they keep the same texture and are not broken down in the batter. Add up to 1/4 cup at most so the batter does not separate and fall apart from too many added in.
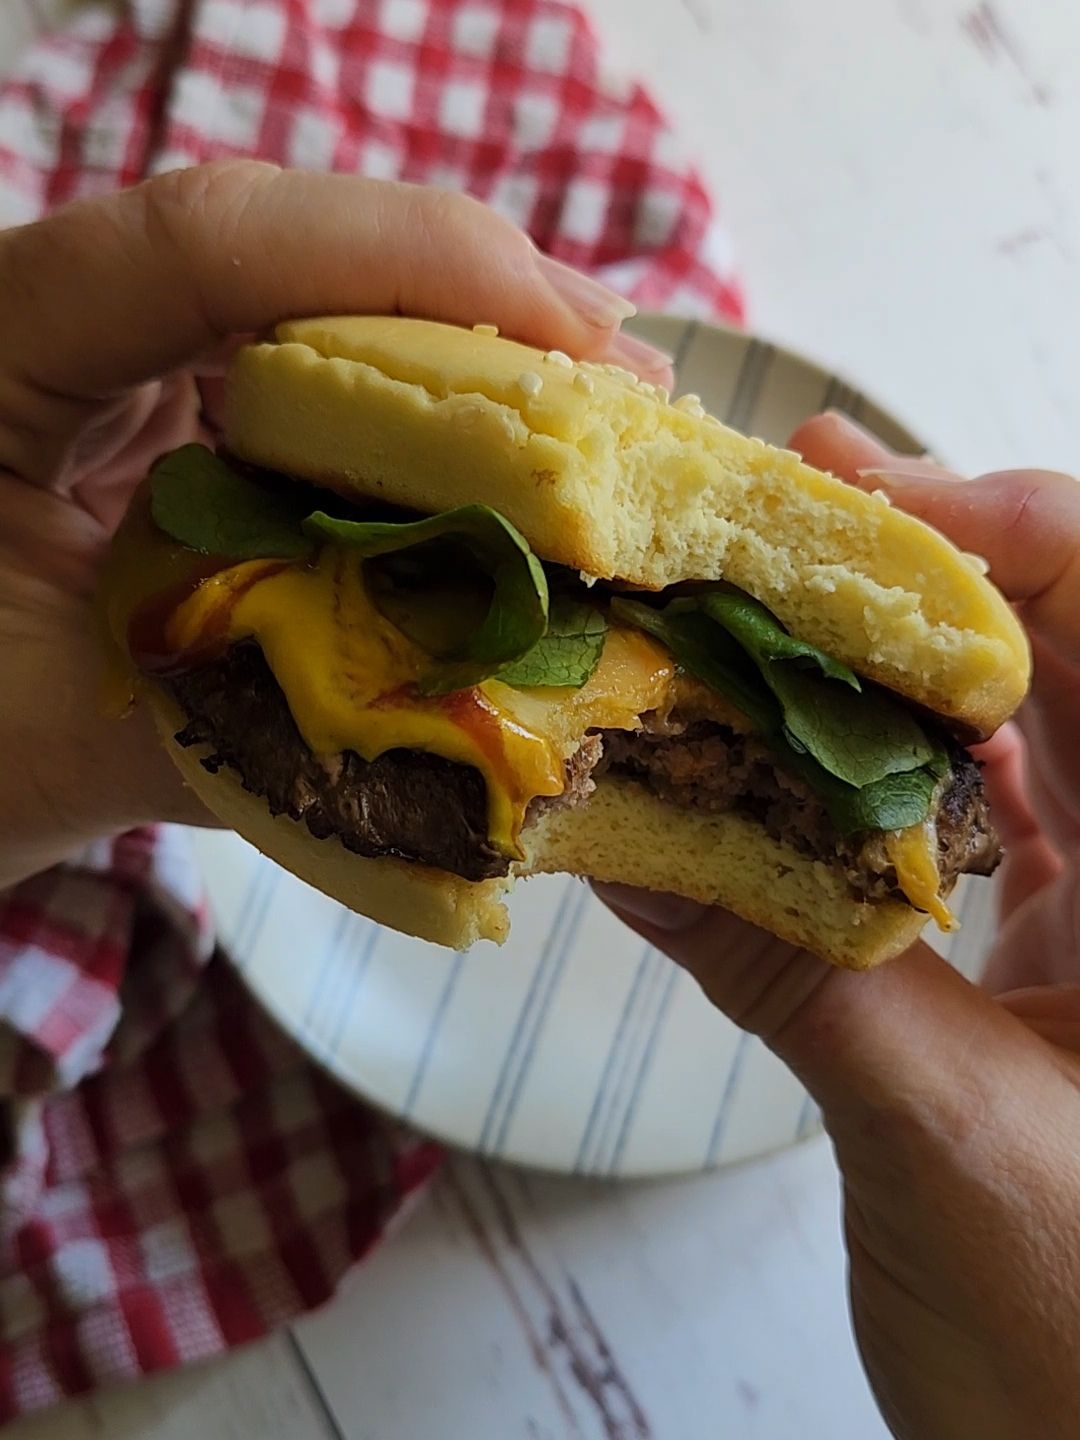
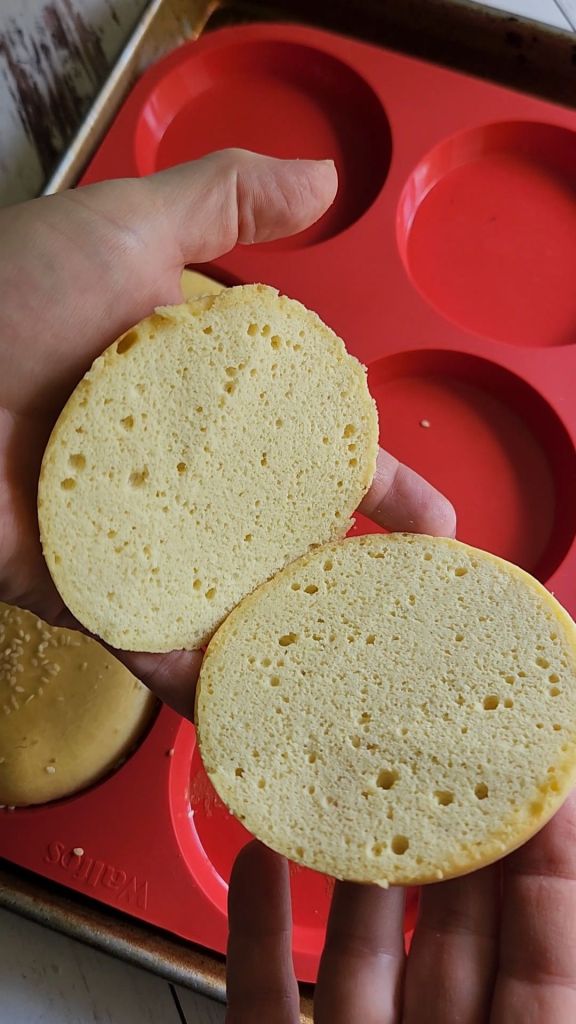
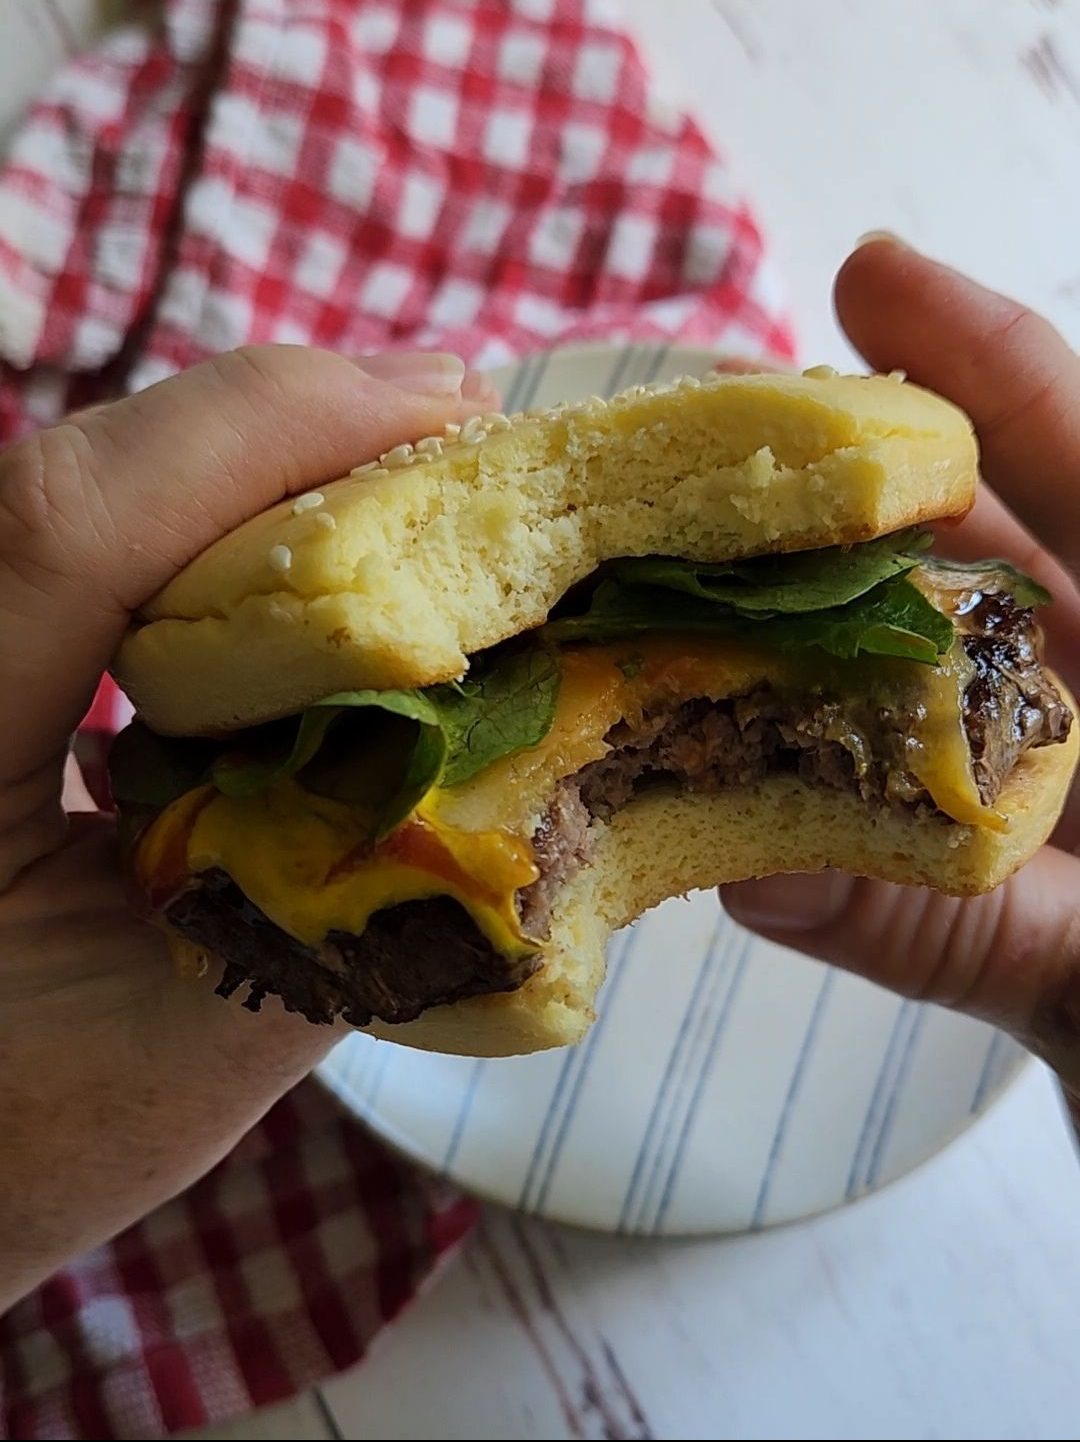
What makes these buns hold together better than store-bought gluten-free buns?
The combination of cream cheese and eggs creates a protein matrix that mimics the elasticity gluten normally provides. The almond flour adds structure without brittleness because its natural oils keep the crumb tender. Store-bought versions often rely on starches that turn crumbly when cooled, while this recipe maintains its soft texture even after refrigeration.
Can I make these buns ahead for a party and how do I reheat them?
Absolutely—these buns actually improve slightly after a day in the fridge as the flavors meld. For best results, bake them 1-2 days before your event and store in an airtight container. To reheat, wrap each bun in a damp paper towel and microwave for 15-20 seconds, or toast the cut sides in a dry skillet for 1-2 minutes until warm and slightly crispy.
Why do my buns sometimes have a slightly eggy taste and how can I prevent it?
An eggy flavor usually means the buns were underbaked or the ratio of eggs to other ingredients was off. Make sure your buns bake until the center is completely set and glossy—they should spring back when touched. Adding 1/4 teaspoon of vanilla extract or using the garlic herb variation helps mask any egg flavor while enhancing the overall taste profile.
Can I double this recipe and will the baking time change?
Yes, you can double or triple the recipe easily. The baking time remains the same since you’re still filling the molds to the same 2/3 level—you’ll just have more buns. Make sure your blender can handle the doubled volume, or blend in two batches. The resting period stays at 5 minutes regardless of batch size.
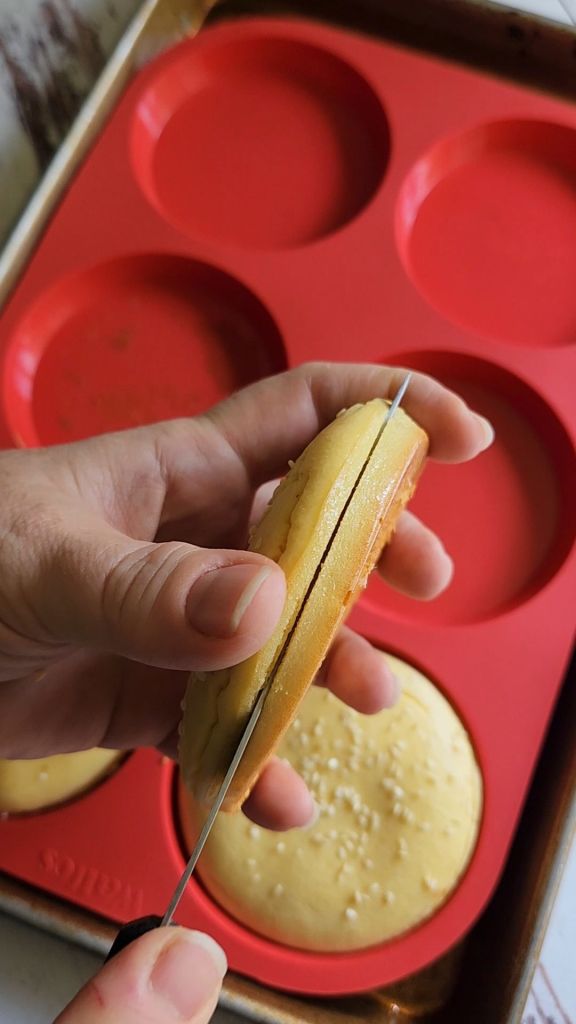
What’s the best way to slice these buns without them falling apart?
Use a serrated knife and a gentle sawing motion rather than pressing down. For the cleanest cuts, let the buns cool completely since warm buns are more fragile. If you’re making sandwiches immediately, consider toasting the cut sides first, which creates a slight crust that helps hold toppings and prevents sogginess from condiments.
Making your own gluten-free hamburger buns at home with the best recipe is not only easy but also incredibly rewarding.
With a little bit of time making this easy blender recipe, you can enjoy fluffy, delicious buns that are perfect for any BBQ or burger night.
Customize the buns with your favorite flavors and toppings and store any leftovers in an airtight container or freezer bag.
This great recipe is sure to become a favorite in your gluten-free kitchen where you never have to miss out on a good burger again!
#1 The 5-minute resting period after blending is non-negotiable because it allows the almond flour to fully hydrate and creates the proper texture that prevents crumbly, falling-apart buns.
#2 Using room temperature ingredients, especially cream cheese and eggs, ensures proper emulsification and even mixing, which directly affects the final texture and rise of your buns.
#3 The recipe yields either 3 large 4-inch buns or 5 smaller 3-inch slider buns depending on your pan choice, and understanding the splitting strategy (2 tops, 4 bottoms from 3 buns) helps you plan topping application correctly.
#4 These buns stay soft and flexible unlike store-bought gluten-free versions because the cream cheese and eggs create a protein structure that mimics gluten’s elasticity without requiring any gums or starches.
#5 A blender produces superior texture compared to a stand mixer by creating completely smooth batter with maximum air incorporation, though a hybrid approach of blending then hand-folding add-ins gives the best of both worlds.
The Best Ever Gluten Free Soft Hamburger Buns Recipe
Equipment
- A blender or food processor
- silicone bun mold pan (4" diameter) or Wide mouth canning rings (3" diameter)
- baking sheet
- parchment paper (if using the canning rings)
Ingredients
- 2 large eggs
- 2 oz cream cheese Use Dairy Free Cream Cheese like Kitehill or Simple Truth
- 2/3 cup almond flour
- 1 teaspoon baking powder
- 10 drops liquid stevia or 1/2 teaspoon granulated sweetener
- Optional Toppings: Sesame seeds, dried minced onion, chives
Instructions
- Preheat your oven to 350 degrees F and prepare your baking pan. Grease the bun pan a little bit and place on a baking sheet or place greased canning rings on the parchment lined baking pan.
- Add the eggs to your blender or food processor first. Follow with the cream cheese, then lastly put in the almond flour, baking powder, sweetener and sea salt.2 large eggs, 2 oz cream cheese, 2/3 cup almond flour, 1 teaspoon baking powder, 10 drops liquid stevia or 1/2 teaspoon granulated sweetener
- Blend or process for 30 seconds. Stop the blender or processor and scrape down the sides of the container to evenly blend the dough ingredients.
- Blend again for 30 seconds then let the batter sit in the blender for 5 minutes. This gives the almond flour time to soak up the liquid ingredients and become thickened.
- Once the wait time is up, blend again. Now pour and scrape the sticky dough evenly into the wells or rings. Fill them up 2/3 of the way to allow space for rising without spilling over. Sprinkle on sesame seeds or any seasonings before baking 15-20 minutes, or until set when pressed gently.Optional Toppings: Sesame seeds, dried minced onion, chives
- They are ready when they appear glossy and firm in the middle. They will not turn as golden brown as yeast bread buns, so do not overcook them because they are still light colored.
- Let them cool on the pan for 5 minutes so you can easily press them out of the mold without tearing. Finish cooling them on a wire rack before using for your burger.
- This recipe makes 3 large 4-inch buns, or 5 small 3-inch buns. One batch of 3 large buns gives you two tops and two bottoms. The third bun will be split in half to create two bottoms. Keep this in mind if you are going to add your favorite toppings to the top of the buns.
- The smaller canning ring sized ones make great sliders for ham and cheese or hamburgers when you split one in half or use one for the top and one for the bottom.
- Store any leftovers in an airtight container in the fridge up to 5 days or freeze up to 3 months. Thaw at room temperature or toast in the toaster if pre-split.
Notes
- Garlic and Herb: Add 1 teaspoon garlic powder and 1 teaspoon dried herbs (such as rosemary, thyme, or oregano) to the dry ingredients.
- Cheese: Mix 1/2 cup shredded cheese (cheddar, mozzarella, or Parmesan) into the batter before rising.
- Sweet Buns: Increase the sweetener and add 1 teaspoon vanilla extract or pineapple extract to the wet ingredients. Adding pineapple extract gives you a Hawaiian roll version.
- Sesame Seeds: Classic and always a favorite is sprinkling on some sesame seeds to the top of the bun batter. Try white sesame or a mix of black and white sesame seeds.
- Poppy Seeds: Adds a nice nutty crunch and visual appeal.
- Everything Bagel Seasoning: For a flavorful twist that goes well with hamburgers or meat sandwiches.
- Sea Salt Flakes: Simple yet delicious with a salty zip with each bite.
- Reduce the amount of fat in the recipe when you replace the whole eggs with egg whites. One whole egg is the same as 2 egg whites.
- Turn these into dinner rolls easily when you bake the dough in a muffin tin. Bake for 10 minutes then check to make sure they are not overcooked. Make them sweetened when you add in 1 tablespoon of maple syrup to the batter before baking.
The combination of cream cheese and eggs creates a protein matrix that mimics the elasticity gluten normally provides. The almond flour adds structure without brittleness because its natural oils keep the crumb tender. Store-bought versions often rely on starches that turn crumbly when cooled, while this recipe maintains its soft texture even after refrigeration. Can I make these buns ahead for a party and how do I reheat them?
Absolutely—these buns actually improve slightly after a day in the fridge as the flavors meld. For best results, bake them 1-2 days before your event and store in an airtight container. To reheat, wrap each bun in a damp paper towel and microwave for 15-20 seconds, or toast the cut sides in a dry skillet for 1-2 minutes until warm and slightly crispy. Why do my buns sometimes have a slightly eggy taste and how can I prevent it?
An eggy flavor usually means the buns were underbaked or the ratio of eggs to other ingredients was off. Make sure your buns bake until the center is completely set and glossy—they should spring back when touched. Adding 1/4 teaspoon of vanilla extract or using the garlic herb variation helps mask any egg flavor while enhancing the overall taste profile. Can I double this recipe and will the baking time change?
Yes, you can double or triple the recipe easily. The baking time remains the same since you’re still filling the molds to the same 2/3 level—you’ll just have more buns. Make sure your blender can handle the doubled volume, or blend in two batches. The resting period stays at 5 minutes regardless of batch size. What’s the best way to slice these buns without them falling apart?
Use a serrated knife and a gentle sawing motion rather than pressing down. For the cleanest cuts, let the buns cool completely—warm buns are more fragile. If you’re making sandwiches immediately, consider toasting the cut sides first, which creates a slight crust that helps hold toppings and prevents sogginess from condiments.
Nutrition
Don’t forget to PIN the pinnable recipe card to your Pinterest board or print the printable recipe card.
Full disclosure, we are affiliates with various companies, including Amazon as an Amazon associate and earn a small commission from these companies when you purchase through my affiliate links. This is at no extra cost to you.
Thank you for supporting my site by leaving a five-star review plus leaving a comment in the comment section with your results.
Leaving a 5-star rating help my keto recipes to be seen by more people which helps others have options too!

This helps my great recipes to be shown to more people for my websites’ success!
View my Privacy Policy from the menu.
Come follow me on social media as well as I post new recipes and videos on Instagram and Pinterest all the time!
If you love cast iron as much as I do, then you would absolutely LOVE my 2nd cookbook “Chaffles Cast Iron and The Crock”!!
Here are more easy gluten free recipes to try!
Quick Gluten Free Copycat Red Robin Seasoning Recipe

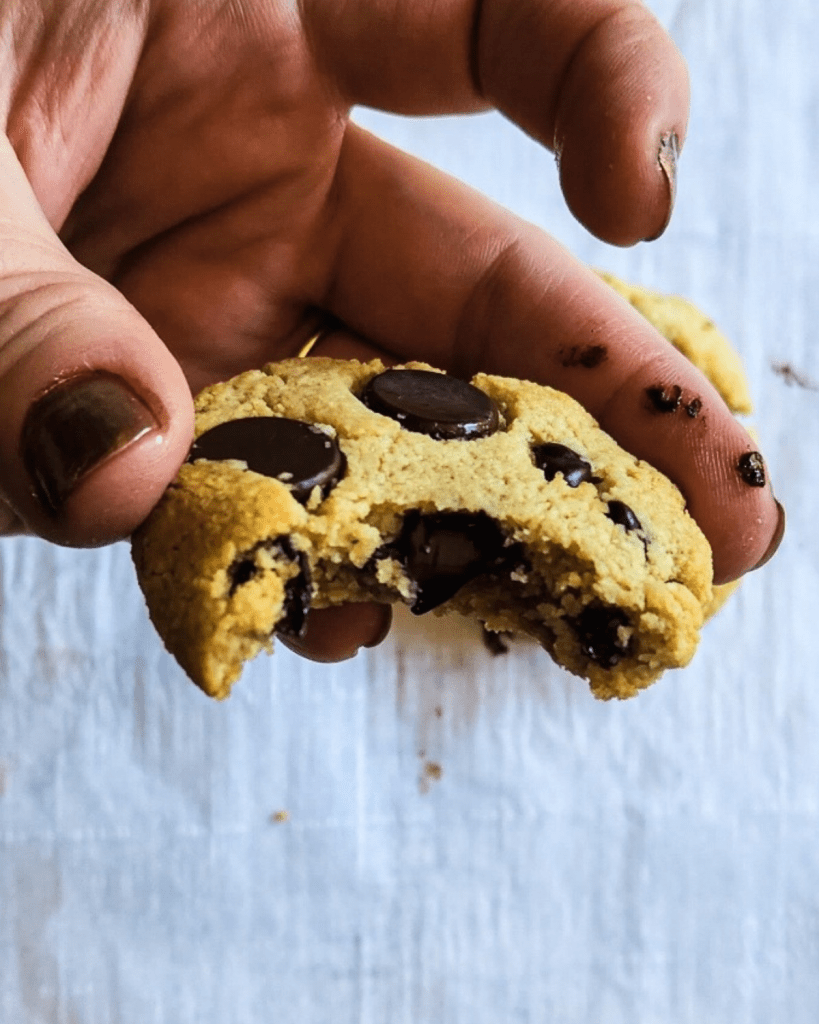
Gluten Free Butterless Chocolate Chip Cookies Recipe
Easy Keto Dairy Free Blondie Recipe (gluten-free)

Air Fryer Recipes Beef Bread Breakfast Cakes Coconut Flour Cold Drinks Cookies and Bars Crockpot Recipes Dairy Free Desserts DIY Recipes Donuts Drinks Hot & Cold Fall Recipes Holiday Recipes Hot Drinks Ice Cream & Toppings Instant Pot Recipes Keto Condiments Keto Ingredients Kitchen Tips & Tricks Low Carb Side Dishes Main Dish Muffins Pies Pork Poultry & Seafood Pumpkin Puree Recipes Quick Gluten Free Lunches/Snacks Seasonal Recipes Skillet Meals Summer Recipes Uncategorized Waffles and Pancakes Winter Recipes